



DynDNS with a MikroTik router
DynDNS with a MikroTik router
DynDNS with a MikroTik router
If your internet connection does not have a fixed IP address, you can have a DNS record at FireStorm updated automatically by your MikroTik router. The router checks its WAN IP at short intervals and reports a change through our DNS API. This keeps a name such as vpn.yourdomain.ch reachable at all times, without any third party DynDNS provider.
The script is deliberately economical. It first resolves the record through a public resolver. If the IP already matches, the run ends without a single API call. Only if it differs does the script read the current value from us and set the record again.
Requirements
- The domain must point to our nameservers, so the DNS zone is hosted at FireStorm
- API access enabled in the customer area (
admin.firestorm.ch=> Account => Customer profile) - A MikroTik device running RouterOS 7
- The DNS record you want to update must already exist. Create it once in the customer area with any IP address and a TTL of 60
1. Create an API key
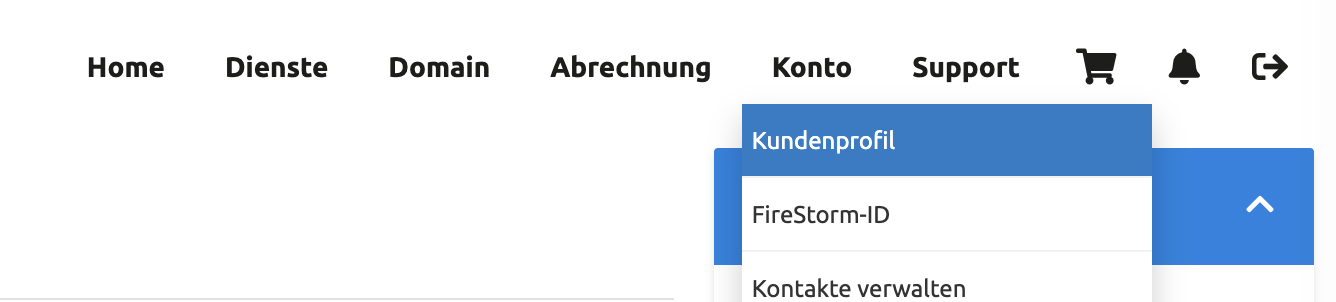
Log in to the customer area and open Account => Customer profile.
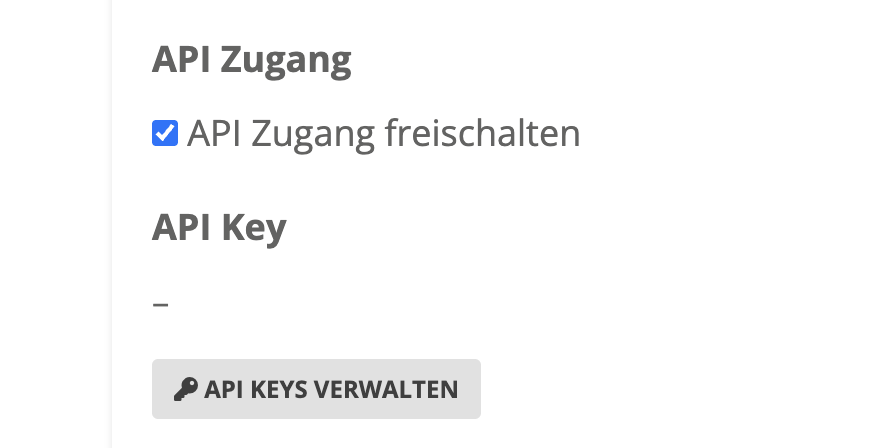
Tick API access and click MANAGE API KEYS.
Create a new key:
- Label: for example
dyndns mikrotik - Domains: select only the domain the router is allowed to change
- Also allow full DNS management: tick this box. Without it the key may only set certificate challenges, not change an A record
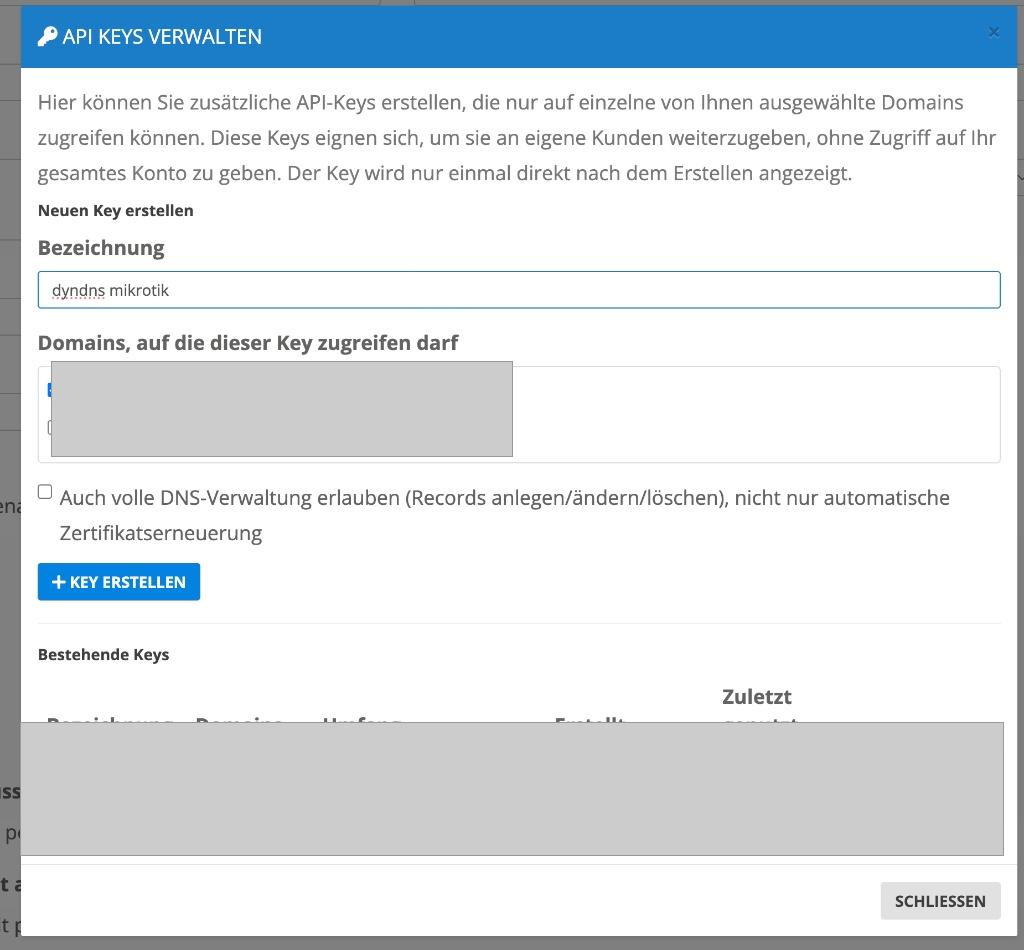
Write down the user name and the API key. The key is shown only once.
2. Find the zone ID
The script works with the numeric zone ID, which the API returns. The following call works on any machine with curl, for example on a Mac, on Linux or in Windows PowerShell:
curl -H "X-Api-Key: YOUR-API-KEY" https://api.firestorm.ch/dns/v1/zones
The answer lists every zone the key may access, each with an id and a name. You will enter the id of your domain in the script later.
3. Import the root certificate into the router
RouterOS does not ship with any certificate authorities. So that the router can actually verify the connection to our API, import the root certificate ISRG Root X1 from Let’s Encrypt once. Without this step you would have to switch certificate checking off, which we do not recommend.
Download the file isrgrootx1.pem from letsencrypt.org/certs/isrgrootx1.pem and drag it into the Files area in Winbox. Then, in the terminal:
/certificate import file-name=isrgrootx1.pem passphrase=""
Alternatively the router fetches the file itself:
/tool fetch url="https://letsencrypt.org/certs/isrgrootx1.pem" check-certificate=no
/certificate import file-name=isrgrootx1.pem passphrase=""
Use the following call to check that the verified connection works. If a zone list comes back, everything is ready:
/tool fetch url="https://api.firestorm.ch/dns/v1/zones" http-header-field="X-Api-Key: YOUR-API-KEY" check-certificate=yes-without-crl as-value output=user
4. Create the script
Download the script: firestorm_mikrotik_dyndns.rsc
In Winbox or WebFig go to System => Scripts, click [+], enter a name such as firestorm_dyndns_update and set the policies read, write, policy and test. Paste the contents of the file and adjust the settings at the top:
| Setting | Meaning |
|---|---|
apiUser |
User name from step 1 |
apiKey |
API key from step 1 |
zoneId |
Zone ID from step 2 |
recordName |
Full name of the record, for example vpn.yourdomain.ch |
recordType |
A for IPv4 or AAAA for IPv6 |
wanInterface |
Name of your WAN interface. With PPPoE this is not ether1 but for example pppoe-out1 |
ttl |
Lifetime in seconds, 60 recommended |
Then click Run Script and look at the Log. It tells you whether the record was already up to date or has just been updated.
5. Set up the schedule
Go to System => Scheduler and click [+]:
- Name: for example
FirestormDyndns - Interval:
00:05:00for a check every five minutes - On Event: exactly the name of your script, for example
firestorm_dyndns_update - Policies: set
read,write,policyandtesthere as well
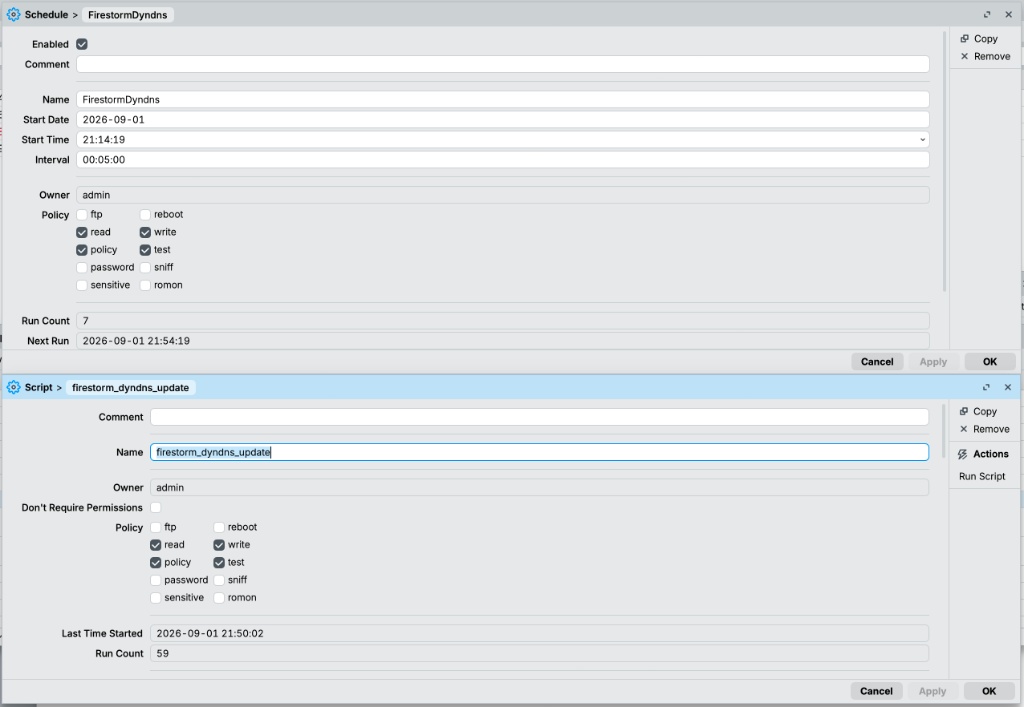
The router now checks on its own and only reports a change to us when the IP address has actually changed.
Troubleshooting
«No matching address found on interface …»
The interface name is wrong. Under IP => Addresses you can see which interface holds your public address. On PPPoE connections this is the pppoe-out link.
«API request failed»
Usually the root certificate from step 3 is missing, or the key is wrong. Try the call from step 3 by hand.
«Record … not present in zone …»
The script never creates new records, it only updates existing ones. Create the record once in the customer area.
The answer «Record not found» while updating
The record was changed by hand in the meantime. The script reads the current value again on its next run and corrects itself.
The router sits behind a connection without a public IP
If your provider only hands out a private address, for example from the 100.64.x.x range, the script enters exactly that address and the name stays unreachable from outside. In that case you need a public IP address from your provider.
Further instructions on our interface can be found in the article DNS API. The script was kindly provided to us by one of our customers.